Ryujinx
Ryujinx Emulator lets you play Nintendo Switch games like The Legend of Zelda: Breath of the Wild on your Windows, Linux, or macOS PC. Forget expensive consoles—you just need legally obtained game files and a computer. This guide makes setting up the Ryujinx Emulator quick and easy, answering common questions and offering clear steps. Enjoy smooth emulation, customizable controls, and better graphics in no time. Start gaming with the Ryujinx Emulator today and bring your favorite Nintendo Switch titles to life!
System Requirements for Ryujinx
Before downloading Ryujinx, ensure your PC meets these minimum requirements:
| Requirement | Minimum | Recommended |
|---|---|---|
| Operating System | Windows 10/11 (64-bit), Linux (Ubuntu 20.04+), macOS 11 (Big Sur)+ | — |
| CPU | 64-bit processor, 4 cores (e.g., Intel Core i5, AMD Ryzen 3) | — |
| RAM | 8GB | 16GB |
| GPU | OpenGL 4.6 or Vulkan-compatible (e.g., GTX 1050, RX 560) | — |
| Storage | 10GB free space | — |
For optimal performance, update your GPU drivers from NVIDIA, AMD, or Intel’s official websites. Check your system specs in Windows Settings > System > About or use System Profiler on macOS.
Guide to Set Up Ryujinx
Follow these clear steps to get started with Ryujinx on your device. This guide assumes you have a Nintendo Switch and legally obtained game files.
Step 1: Download Ryujinx
Visit the official Ryujinx website at ryujinx.org to download the latest build. Choose the correct version for your operating system:
Linux (normal)
Standard Linux executable, with its dependencies, in a tarball.
Download x64 Download ARMStep 2: Extract and Install Ryujinx
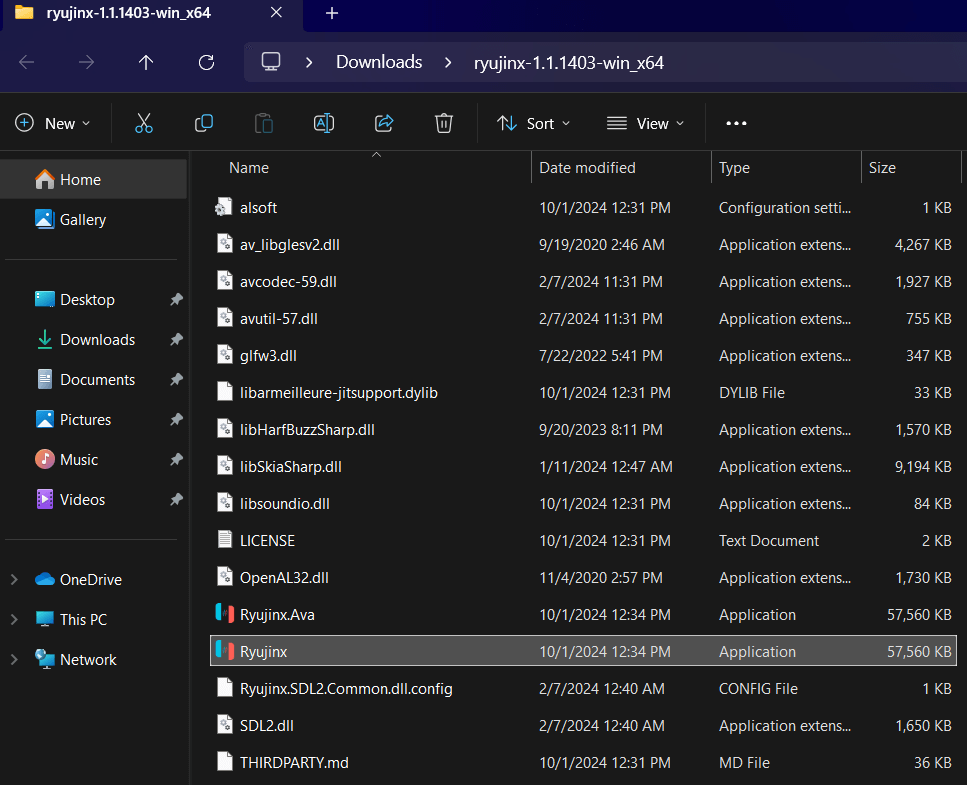
- Windows: Right-click the ZIP file, select “Extract All,” and choose a destination folder (e.g., Desktop or Documents).
- Linux: Use tar -xvf in the terminal to extract the file.
- macOS: Double-click the ZIP file to extract it automatically.
Open the extracted folder and double-click the Ryujinx executable to launch. No installation is required, but keep the folder accessible.
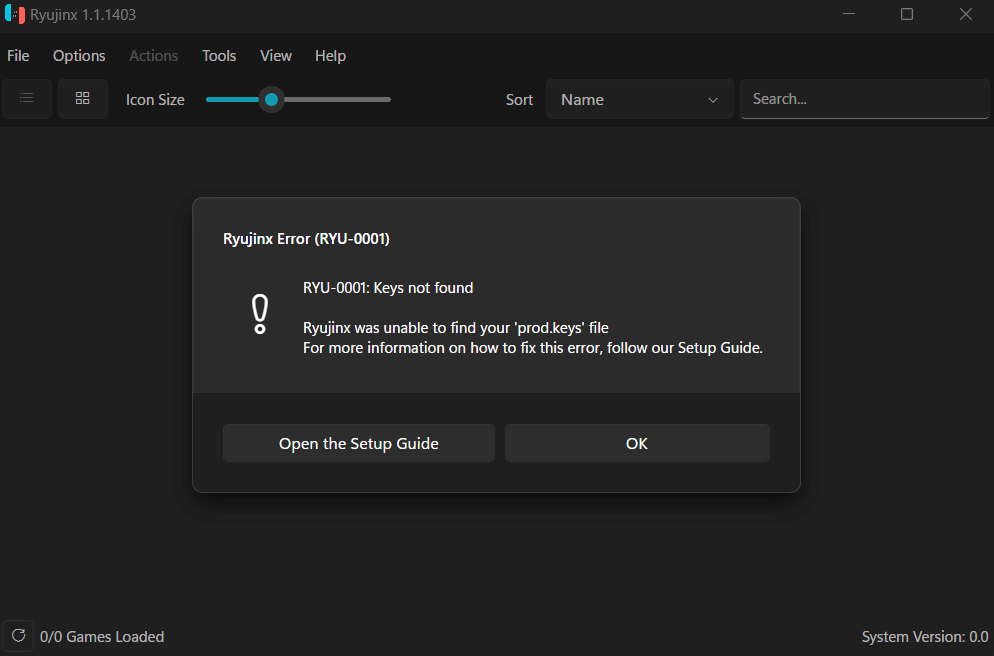
Step 3: Obtain Firmware and Keys
Ryujinx requires Nintendo Switch firmware files and prod.keys/title.keys to run games. These must be legally dumped from your own console using homebrew tools like TegraRcmGUI or Lockpick_RCM. Place these files in the Ryujinx system folder (found in the emulator’s directory). For detailed instructions, check the official Ryujinx Setup Guide at ryujinx.org/setup.
Step 4: Add Your Game Files
Legally obtain game files (XCI or NSP format) from your Nintendo Switch using homebrew tools. In Ryujinx:
- Open the emulator.
- Click File > Add New Game Directory.
- Select the folder containing your game files.
- Click OK to load your games into the emulator’s library.
Never download game files from unofficial sources, as this violates Nintendo’s terms and Ryujinx’s policies.
Step 5: Configure Settings
Customize Ryujinx for the best experience:
- Graphics: Go to Options > Settings > Graphics. Enable Vulkan for better performance or OpenGL for compatibility. Adjust resolution (e.g., 1080p or 4K) based on your PC’s power.
- Input: In Options > Settings > Input, map your controller or keyboard. Test inputs to ensure responsiveness.
- Audio: Set audio output to your preferred device in Options > Settings > Audio.
- Game Updates: Add game updates or DLC files via File > Open Ryujinx Folder > mods.
Save settings and restart Ryujinx if needed.
Step 6: Play Your Games
Double-click a game in the Ryujinx library to start. Use the compatibility list at ryujinx.org/compatibility to check if your game runs smoothly. If issues arise, tweak graphics settings or update Ryujinx to the latest version.